Installing a thermostat might seem like a technical job, but with the right tools and a clear process, most homeowners can handle it themselves. Whether you are upgrading to a digital model, adding a smart thermostat for energy savings, or installing a programmable option, this guide explains the entire process in simple steps. You will learn how to prepare, remove your old device, mount the new one, connect the wires, and test your system. By the end, you’ll know exactly how to install a home thermostat safely and efficiently.
Quick Installation Summary
Before diving into details, here is the whole process at a glance:
| Step | Title | Time Estimate | Difficulty | Tools Needed |
|---|---|---|---|---|
| 1 | Turn Off Power | 5 min | Easy | Circuit breaker access |
| 2 | Read Instructions | 10 min | Easy | Manual |
| 3 | Test for Power | 5 min | Easy | Voltage tester |
| 4 | Photograph Wiring | 5 min | Easy | Smartphone |
| 5 | Remove Old Thermostat | 15 min | Moderate | Screwdrivers |
| 6 | Mount New Plate | 20 min | Moderate | Drill, level, wall anchors |
| 7 | Connect Wires | 20 min | Moderate | Screwdrivers, labels |
| 8 | Attach Thermostat | 10 min | Easy | None |
| 9 | Restore Power & Test | 20 min | Easy | Thermostat controls |
| 10 | Configure Settings | 30–40 min | Easy | Wi-Fi/app (for smart models) |
This overview helps you plan ahead, but don’t skip the detailed instructions in later sections.
How to Install a Home Thermostat
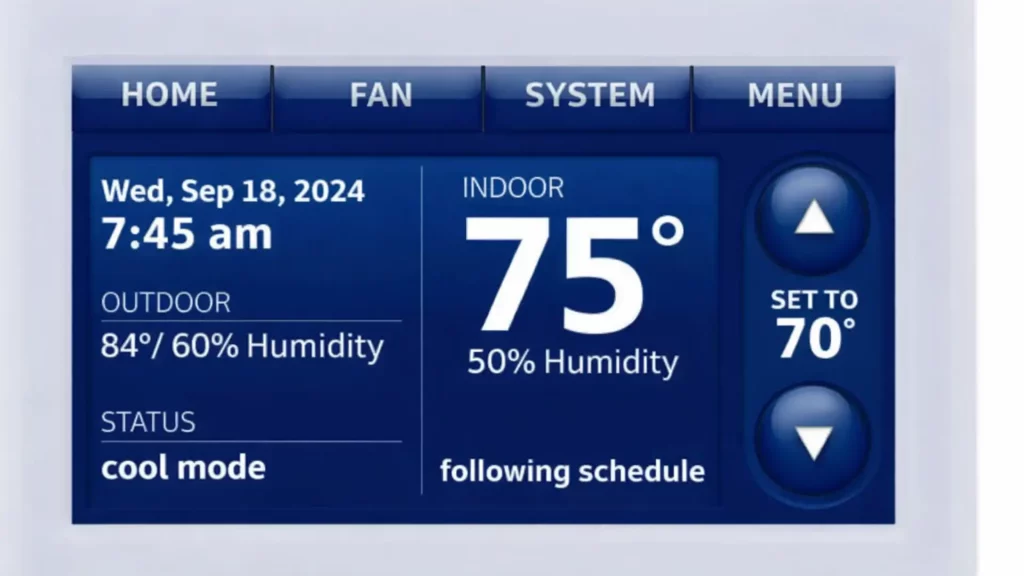
The term “home thermostat” usually refers to the device that controls heating and cooling inside a house. It can be a basic manual dial, a programmable thermostat that follows schedules, or a smart model with Wi-Fi. The most important step before choosing one is checking compatibility with your HVAC system. Not all devices work with every furnace, heat pump, or central AC unit.
If you want advanced features like remote access, app-based scheduling, or integration with voice assistants, a smart thermostat is a good investment. For those who prefer something simple, a programmable thermostat is more affordable and still helps save energy by automatically adjusting temperatures. Whatever you choose, always check safety instructions, and remember to turn off power at the breaker before touching any wiring.
Tools, Materials, and Safety Gear
Installing a thermostat is easier when you have the right tools ready. Most jobs require:
- Phillips screwdriver – Removes screws from the base plate.
- Flathead screwdriver – For gently prying covers.
- Voltage tester – Ensures no live current before touching wires.
- Wire labels or tape – For marking each wire before disconnecting.
- Drill with bits – To create holes for the new mounting plate.
- Wall anchors and screws – Provide support if no stud is present.
- Level – Keeps your thermostat aligned on the wall.
- Gloves and safety glasses – Protect your hands and eyes.
If you’re learning how to install a new thermostat that is smart-enabled, you may also need a C-wire adapter or a small precision screwdriver for terminal connections.
Read More: Thermostat Display Not Working or Blank?
How to Install a New Thermostat (Preparation Stage)
Preparation is key to a safe and smooth installation. Start by turning off power at the breaker box to cut electricity to your HVAC system. Even if you feel confident, don’t skip reading the manufacturer’s instructions — thermostats differ from brand to brand. Next, use a voltage tester to confirm there is no power running through the wires. Finally, take clear photos of the existing wiring setup. These pictures will serve as a reference point when you connect the new device.
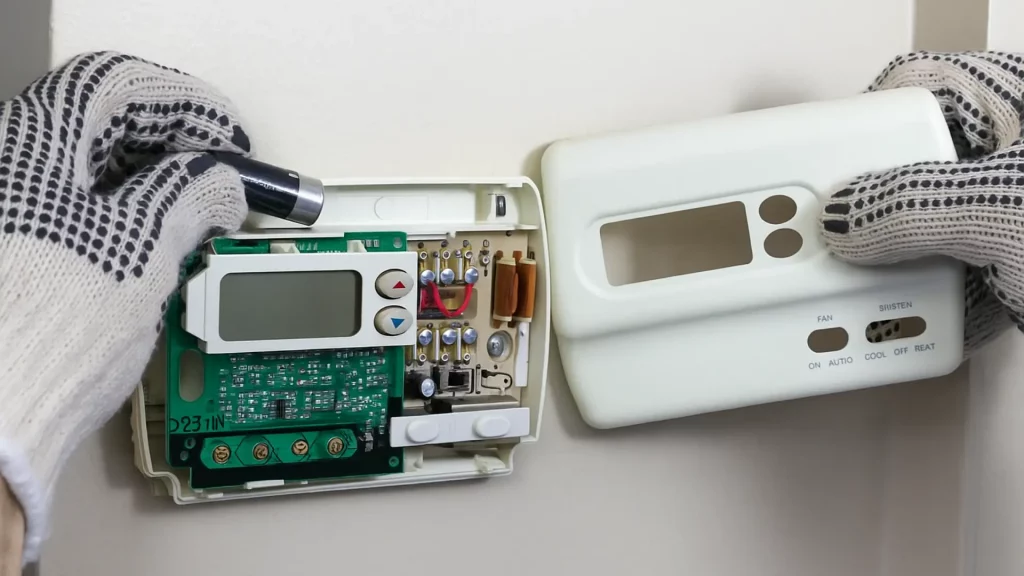
How to Remove Your Old Thermostat
Removing the old thermostat requires care. First, gently remove the cover to expose the wiring. Before you disconnect anything, label each wire according to its terminal code (R, W, Y, G, C). This will save confusion later. Loosen the terminal screws and carefully pull the wires out. Finally, unscrew the mounting base from the wall. Once removed, you may want to patch or clean the wall before mounting the new unit for a cleaner look.
Read More: Why Your Thermostat Suddenly Stops Working
Installing the New Thermostat Mounting Plate
Now it’s time to prepare the wall for the new unit. Feed the wires through the opening in the mounting plate, making sure they are not pinched. Use a level to keep the plate straight before screwing it into the wall. If there is no stud behind the location, insert wall anchors for extra support. A properly secured and level base ensures your thermostat will sit flush and function correctly.
How to Install a Smart Thermostat (Step-by-Step)
Smart thermostats are popular because they allow remote control and energy monitoring. To install one, connect the labelled wires to their correct terminals. Most will need a C-wire for constant power. If your system doesn’t have one, many manufacturers include adapters or provide alternative wiring options. After connecting the wires, mount the base securely and snap the thermostat unit in place.
Once power is restored at the breaker, the device will light up. Follow the on-screen prompts to connect to Wi-Fi, pair with the mobile app, and enable features like geofencing or voice control with Alexa or Google Home. This is the stage where smart thermostats truly show their value by learning your habits and providing real-time energy reports.
Read More: Smart Thermostat vs Programmable Thermostat
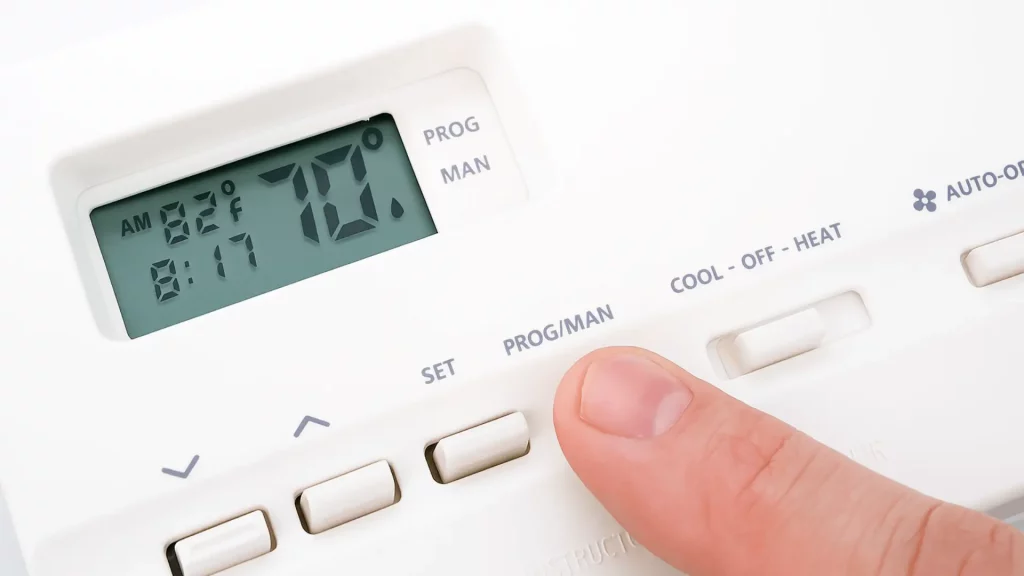
How to Install a Programmable Thermostat
If you’re working with a programmable model, the process is straightforward. Connect each wire to the correct terminal as per your labels and secure them firmly. Mount the thermostat onto the plate and insert batteries if required. After powering up, set the correct date and time. Then, program schedules for weekdays and weekends so your home stays comfortable when you need it and saves energy when you don’t. For example, you can program lower heating when you’re at work and increase it before you return home.
Connecting and Testing the Thermostat
Testing ensures everything works correctly. Switch to heating mode and check if the furnace activates. Do the same with cooling mode to test your air conditioner. Turn the fan on and off to confirm proper airflow. If the system doesn’t start, double-check your wiring connections and make sure the breaker is turned on. Most issues come down to a mis wired connection or loose terminal.
Read More: How to Change a Thermostat Battery
Maintenance and Seasonal Optimization
A thermostat doesn’t need heavy maintenance, but light care improves performance. Dust around the device regularly to prevent blocked sensors. If you’ve installed a smart thermostat, check for firmware updates that bring new features or bug fixes. For programmable units, adjust schedules seasonally. For example, lower cooling settings in spring and reduce heating needs in early fall. Small adjustments help reduce energy bills without affecting comfort.
Wiring Diagrams and Quick Reference Charts
Understanding wiring codes makes installation easier:
- R (Red) – Power from transformer
- W (White) – Heat signal
- Y (Yellow) – Cooling signal
- G (Green) – Fan control
- C (Blue/Black) – Common wire for continuous power
If your system includes a C-wire, smart thermostats will run seamlessly. Without a C-wire, you may need batteries or an adapter, depending on the model.
FAQs About Installing Thermostats
1. Do I need a C-wire for my smart thermostat?
Yes, most smart models require it, though adapters are available if your system doesn’t have one.
2. How long does it take to install a home thermostat?
The average installation takes between one and two hours.
3. Can I install a thermostat without turning off power?
Never. It’s unsafe and risks damaging both you and your HVAC system.
4. Is professional installation worth it?
For complex systems, yes. If you’re comfortable with DIY wiring, you can do it yourself.
5. Will installing a thermostat myself void my HVAC warranty?
Usually not, but always confirm with your system’s manufacturer.
Safety Disclaimer & Professional Assistance
While most homeowners can handle installing a thermostat, safety should always come first. If you encounter high-voltage wiring, unusual connections, or feel unsure at any stage, stop and call a licensed HVAC technician. For additional guidance, consult the official manual of your thermostat model and follow local safety regulations.
With this step-by-step guide, you now know how to safely install different types of thermostats, from basic models to smart devices. Whether you choose a programmable thermostat for schedules or a connected smart unit for remote control, the process is simple if you follow preparation, wiring, and testing carefully.